

How To Draw Anime Head 3/4 View

I've made a post on how to describe the head and the face in the front and side view, now information technology's time to acquire how to draw the 3/4 view! It is ane of the most common confront angle people depict in, particularly for beginners. In club to depict a 3/4 view confront properly, you'll need to understand some elementary cognition on perspective and anatomy, which I will go through in this post. One time you lot've learnt the bones rules, you can then adapt them into dissimilar styles of your choice. And then without further ado, let's brainstorm.
Before we fifty-fifty start cartoon, let's have a look at some of the things we need to know nearly the confront in 3/four view.
Try out the 30 Days Free Trial! The digital painting software for illustration, comics and animation!
The eyes
In the 3/4 view, one role of the face is further away from the viewer compared to the other part. Then one matter you demand to know is that objects of the same size will look smaller when information technology's further away from y'all. For example, a car right in front of you would await a lot bigger than a auto 100 meters away from you.
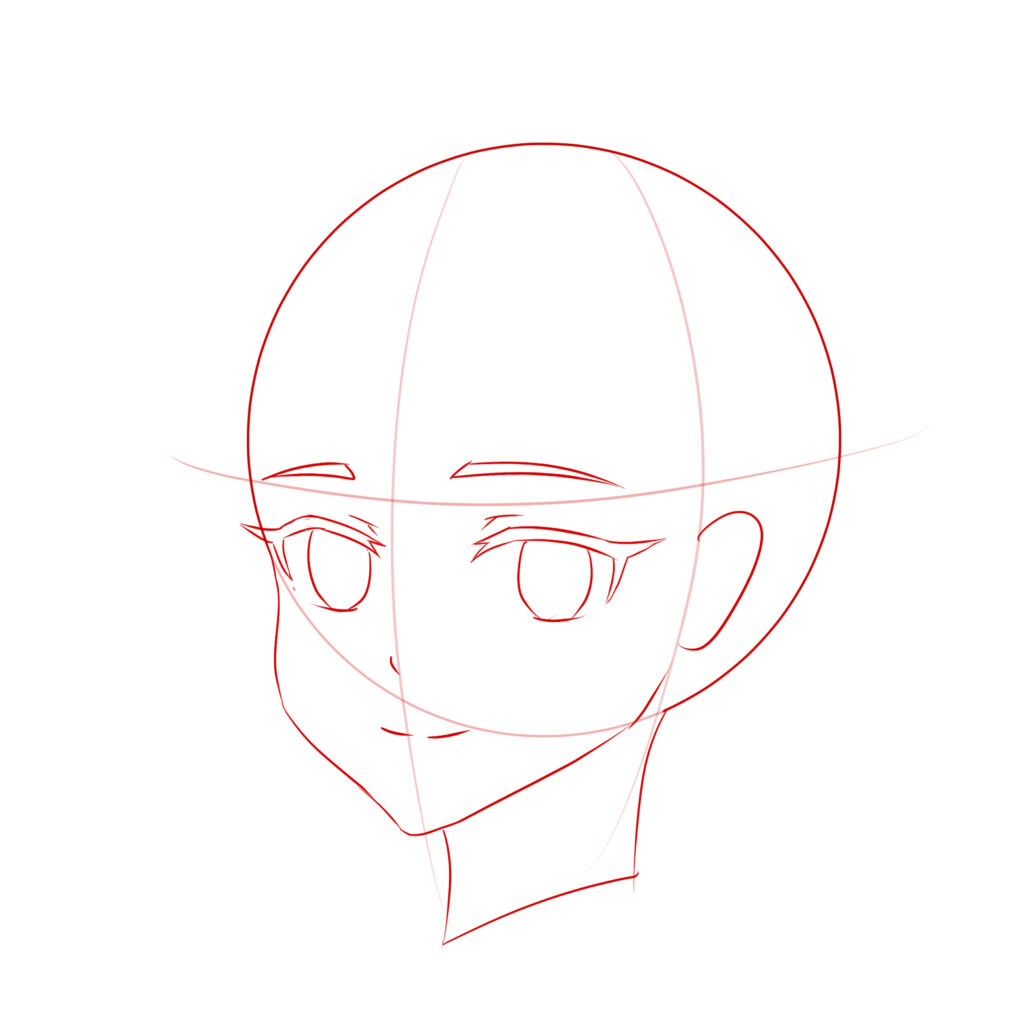
When in the 3/4 view, the eye that is further away volition be slightly smaller compared to the other eye that's closer to us. However, don't make information technology besides minor since the difference in distance isn't too large. Also, note that the height of the optics should still be the same, simply the width will be smaller.
The eyebrows
Similar to the eyes, the eyebrows farther abroad will be slightly shorter. They'll also be more towards the left side of the optics due to perspective. In more detail, the eyes are set into the skull while the eyebrows are more outward, this difference in depth is why the eyebrows are not straight above the eyes when viewed in angles.
In the drawing below, you can run across that the eyebrows are not directly above the eyes, they are slightly to the left.
The nose
The nose is commonly shown as a simple dot or line on the face in anime style. Notwithstanding, placing it correctly is important. The nose protrudes out of the confront. So perspectives come into play when in 3/4 view, information technology should not be right down the centre of the optics. Information technology should be more towards the eyes that are further abroad. This is also why the guidelines are slightly curved. Y'all will see them in the step by step tutorial below.
The rima oris
Placing the mouth properly on the 3/four view tin be quite challenging for some. It doesn't protrude out of the face up equally much as the nose. Then it should be slightly more towards the eye of the optics compared to the olfactory organ.
Drawing a three/4 view in anime fashion
I will now become through my process in drawing the 3/4 head seen at the tiptop of this post! Since this mail is on drawing in the 3/4 view, I won't go into item about drawing the facial features and hair. I will make separate tutorials on them in the future.
Adding guidlines
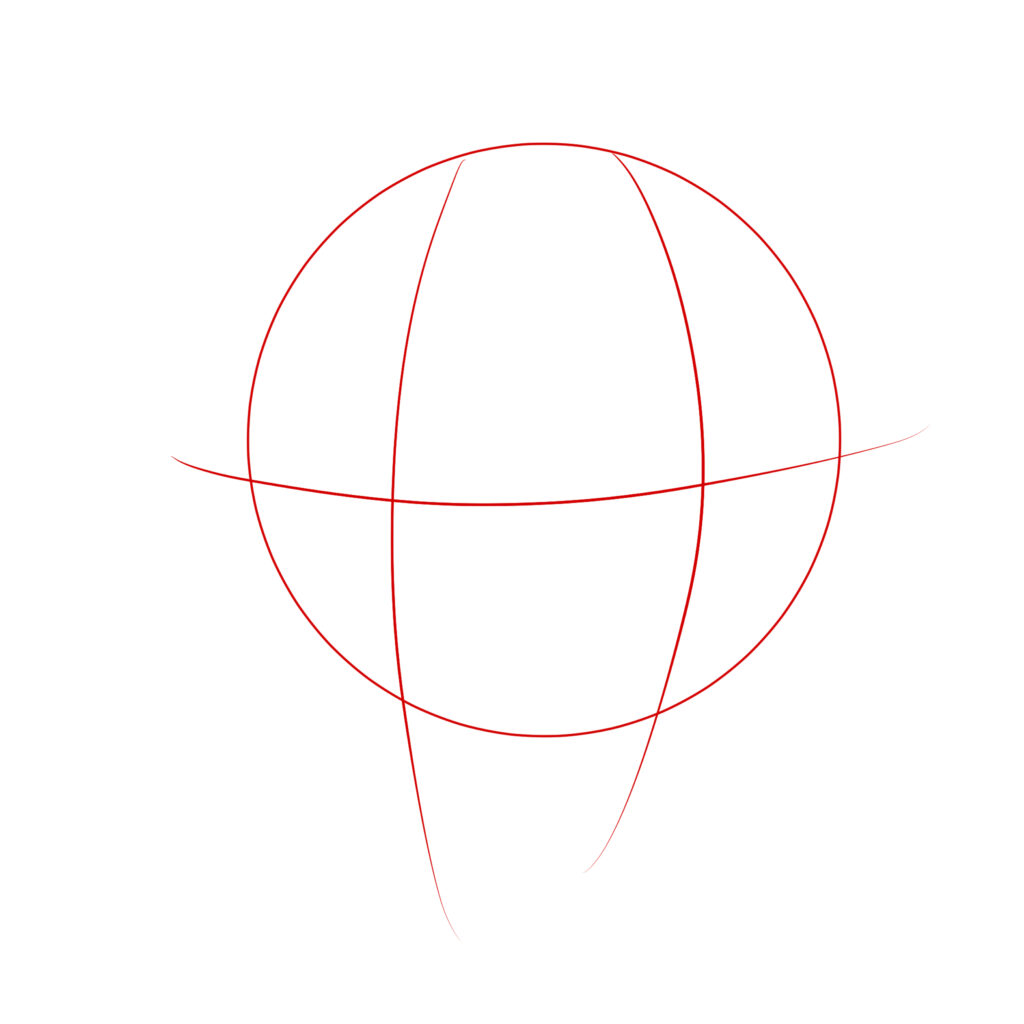
As usual, I started off with a circle and some guidelines. Draw a curved line vertically around 3/four to the side of the circle and i more at the other side.
1 line will be guiding the middle of the face and another volition assist us locate where the ear and end of the jaw is.
Draw a horizontal line across the centre of the circumvolve. This is to aid locate the rest of the features later on, similar eyebrows or eyes.
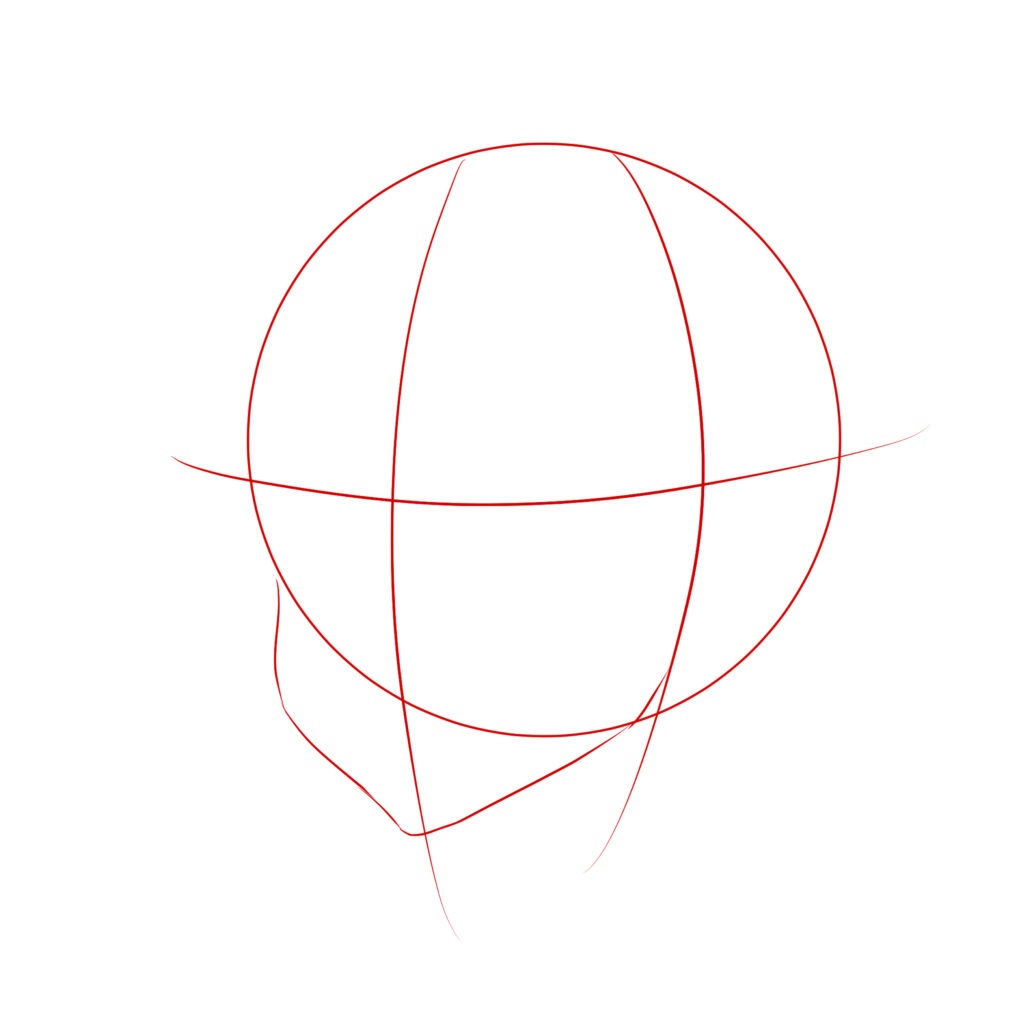
Adding the chin
Mark where you lot want the lesser of the mentum to be. I wanted to draw a cute girl so the chin is not as well low. Note that there'south a slight dip where the cheek is(left side). This is because our eyes sit slightly in the skull, so when viewed at iii/4 view, you tin can see a slight dip there depending on how deep-set up the optics are.
At the right side, the jaw ends aroughly where the other curved line and the circle affect.
Calculation in features
The optics sit slightly below the horizontal bend line we made earlier. Information technology is also where there's a slight dip above the cheeks.
And again equally usual, the nose is betwixt the eyebrows and lesser of the mentum. The rima oris is located between the nose and the bottom of the mentum but alittle higher. The ear lies between the top of the eyes and the lesser of the nose, it also sits around the curved guide line on the right we made earlier.
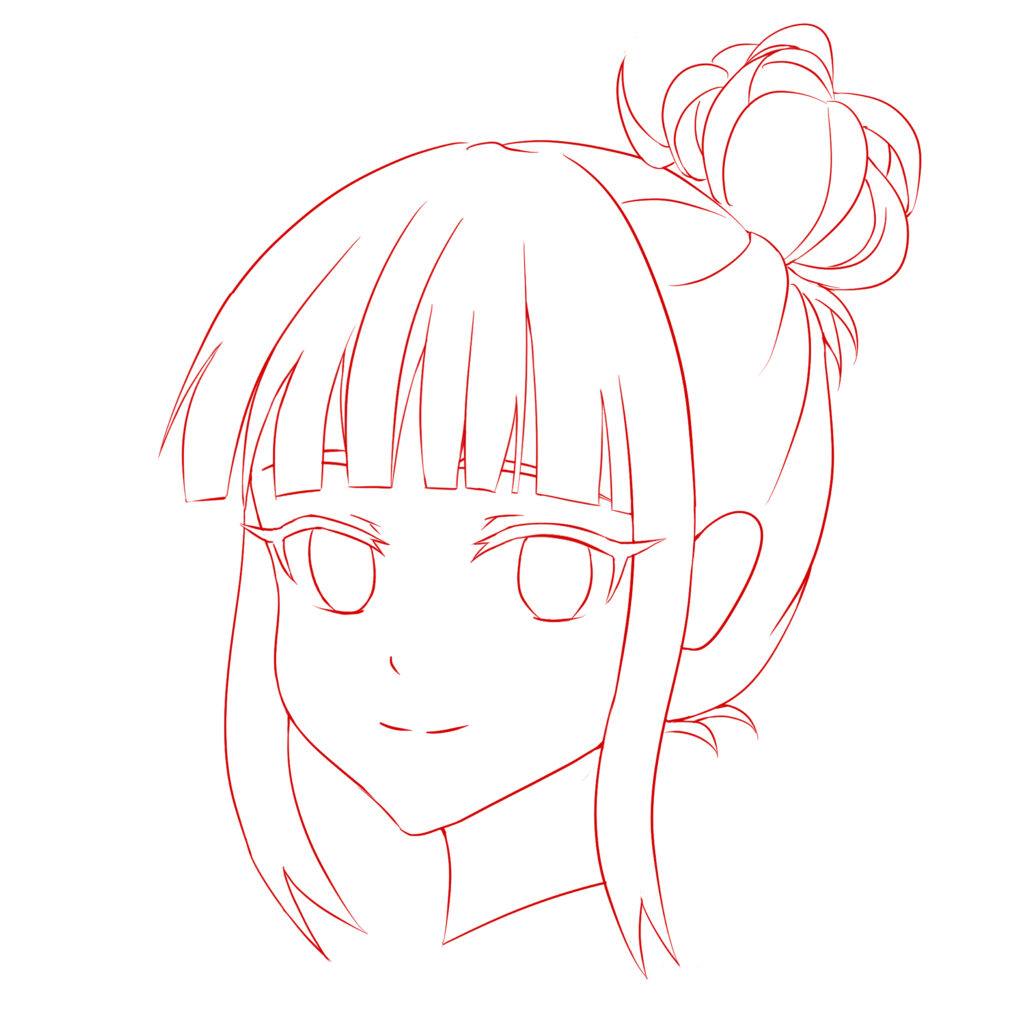
Add in the hair
Add together in the hair! Make sure there's some volume/space between the hair and the skull! I'll be making hair drawing tutorials in the future.
Colour!
Now you're at the fun colouring role! Have fun! I will make tutorials on how I colour in the futurity.
And so those are the steps and guidelines I've used to describe this head in iii/iv view! I hope y'all find it like shooting fish in a barrel to follow! Try it out yourself and see if information technology works for you. At that place are many other ways in which yous can construct your guidelines, feel costless to try them all out and run into which one suits you better.
Outset your digital drawing journey today with Prune Studio Paint!
Attempt out the Clip Studio Paint 30 days free trial!
It is the app for artists, designed for drawing & painting. Open the door to creativity without limits, with specialized features for analogy, comics, manga, webtoons, concept art, design, and animation built-in.
It is the chief software that I use for my digital drawings. It is a cheaper(old payment!) alternative to Photoshop.
I hope you've enjoyed reading this post and has plant information technology useful. If y'all purchase anything through the affiliate links that I've provided, I'll go a small-scale amount of commission (at no extra toll to you!) which helps me proceed writing art-related blog posts and tutorials like this one.
You may also be interested in:
- How to draw the head and face up – anime-mode guideline side view
- How to describe the head and confront – anime-manner guideline front view
- How to depict anime chibis – general features
- Digital painting for beginners

Back up me on Ko-fi! Your donations and support mean a lot to me and it helps me keep doing what I'one thousand doing!
Like my artworks? You lot can get them in prints, stickers or badges form on my Etsy shop!
Follow me on Instagram to encounter more of my art!
I offer fine art commissions!
Source: https://maryliart.com/how-to-draw-the-head-and-face-in-3-4-view-anime-style
Posted by: reeseacceent.blogspot.com
0 Response to "How To Draw Anime Head 3/4 View"
Post a Comment